The Role of Photography in Crime Scene Investigation
Photography, at its core, is the art and science of capturing light to create an image. In forensic photography, the goal is accurately recording evidence rather than artistic expression.
Basic Principles of Forensic Photography
Forensic photography is scientific documentation of a scene or evidence. The goal is accuracy, clarity, and reproducibility, rather than artistic effect.
1. Accuracy and Truthfulness
-
Images must faithfully represent the scene.
-
No manipulation that alters evidence (brightness adjustments must not mislead).
-
Forensic principle: “Document first, disturb later.”
2. Completeness
-
Capture all relevant aspects of the scene: overall layout, mid-range, and detailed evidence.
-
Multiple angles are taken to ensure nothing is missed.
3. Clarity and Detail
-
Photos must show fine details such as fingerprints, blood stains, fibers, or tool marks.
-
Use proper focus, lighting, and magnification.
4. Scale and Perspective
-
Include rulers, scales, or markers to indicate size of evidence.
-
Capture spatial relationships between evidence items.
5. Documentation
-
Each photograph should be logged with date, time, photographer, case number, and description.
-
Essential for chain of custody and court admissibility.
6. Lighting Control
-
Proper lighting is essential to enhance textures and reveal hidden evidence.
-
Techniques: Natural light, flash, side-lighting, UV or infrared light for latent evidence.
Techniques in Forensic Photography
Forensic photography uses systematic techniques to document a scene effectively
1. Overall Photography (Wide-Angle)
-
Shows entire scene and context of evidence.
-
Taken from corners or elevated positions.
-
Ensures spatial relationships are visible.
2. Mid-Range Photography
-
Focuses on specific areas or groups of evidence.
-
Use reference markers to show size and relative location.
-
Bridges the gap between overall and close-up shots.
3. Close-Up / Detail Photography
-
Captures individual evidence items with high detail.
-
Always include scale/ruler in the frame.
-
Often uses macro lenses or magnification for small objects.
4. Use of Special Lighting and Filters
-
Side-lighting highlights textures (like impressions or footprints).
-
UV / IR light reveals latent prints or biological stains.
-
Polarizing filters reduce glare from reflective surfaces.
5. Proper Camera Settings
-
Manual control of shutter speed, aperture, and ISO ensures consistent exposure.
-
Tripods prevent blur in low-light situations.
-
Focus is critical for evidence clarity.
6. Photographing People
-
Injuries and marks must be accurately documented.
-
Use neutral background, proper lighting, and multiple angles.
7. Evidence Labelling
-
Place numbered markers next to evidence.
-
Take photos before and after evidence removal.
-
Ensure markers don’t obscure the object.
8. Chain of Custody and Documentation
-
Photograph all evidence with labels and scales.
-
Maintain logs for each photograph: time, photographer, case number, description.
-
Ensures court admissibility.

Exposing (Capturing the Image)
Exposing is the process of allowing light to fall on the film or sensor to create a latent (invisible) image.
Key Points
-
Camera setup: Choose correct aperture, shutter speed, and ISO/film speed.
-
Lighting: Ensure proper illumination for clarity of evidence.
-
Composition: Capture overall scene, mid-range, and close-ups.
-
Focus: Critical for details like fingerprints or tool marks.
Developing (Processing the Film)
Developing is the chemical process that converts the exposed film into a visible and permanent image.
Steps
-
Development
-
Converts exposed silver halide crystals to metallic silver, forming the visible image.
-
Requires a developer chemical and controlled time/temperature.
-
-
Stop Bath
-
Stops the development process to prevent overdevelopment.
-
Usually a weak acid solution.
-
-
Fixing
-
Removes unexposed silver halide crystals.
-
Makes the image permanent and light-resistant.
-
-
Washing & Drying
-
Removes residual chemicals to prevent damage.
-
Film is dried in a dust-free area.
-
Printing (Creating Photographs)
Printing is the process of transferring the developed film image onto photographic paper to create physical evidence.
Steps
-
Enlarger Setup
-
Project film image onto light-sensitive photographic paper.
-
Adjust focus and size as needed.
-
-
Exposure
-
Paper is exposed to light through the film, creating a latent image.
-
-
Development
-
Paper is placed in developer solution to make the image visible.
-
-
Stop Bath
-
Stops the paper development process.
-
-
Fixing
-
Makes the image permanent and prevents further light exposure from altering it.
-
-
Washing & Drying
-
Removes all chemicals and prevents long-term degradation.
-

Digital Photography in Forensics
Digital photography is the use of digital cameras to capture images electronically, rather than on film, which can then be stored, analyzed, and reproduced without loss of quality.
Key Features in Forensics
-
High-resolution imaging: Allows capturing minute details of evidence, such as fingerprints, tool marks, or injuries.
-
Accuracy: Modern forensic cameras can capture true-to-life color and scale, which is essential for legal documentation.
-
Immediate review: Images can be checked instantly at the scene to ensure all evidence is properly recorded.
-
Metadata: Digital images store metadata (date, time, camera settings) which can help verify authenticity.
-
Non-destructive: Evidence can be documented without altering or moving it unnecessarily.
Applications
-
Crime scene documentation
-
Evidence capture (e.g., weapons, blood spatter, documents)
-
Injury or body documentation in forensic pathology
- Accident reconstruction
Digital Videography in Forensics
Digital videography is the use of digital video cameras to record moving images and events at a crime scene or during evidence collection.
Key Features in Forensics
-
Contextual documentation: Video can capture the scene as a whole, including the spatial relationship between objects.
-
Dynamic evidence: Useful for capturing things that change over time (like blood flow, environmental conditions, or actions during a crime scene investigation).
-
Audio recording: Provides an additional layer of documentation if necessary.
-
Playback and analysis: Video can be reviewed, paused, and enhanced for closer examination of details.
Applications
-
Recording crime scenes for courtroom presentation
-
Surveillance or security footage analysis
-
Documenting the process of evidence collection for chain-of-custody purposes
-
Accident or incident reconstructions
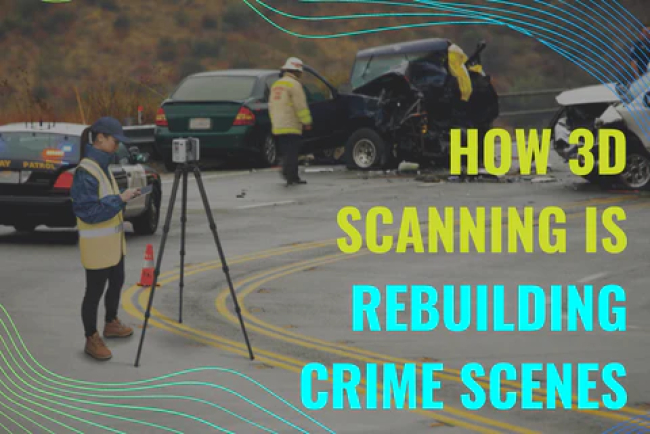
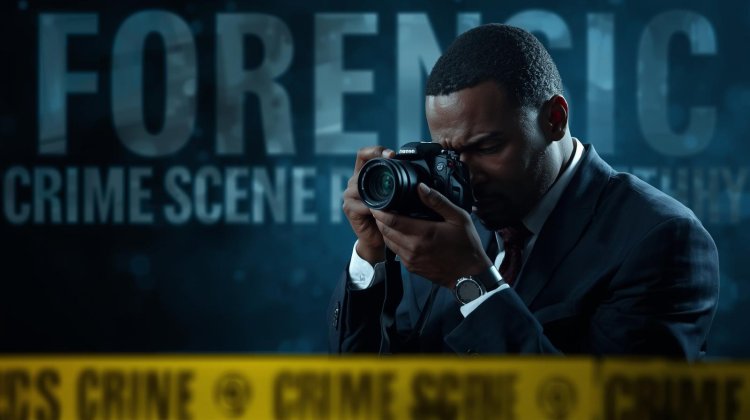
Crime Scene Photography
Crime scene photography is the practice of systematically capturing visual records of a crime scene, evidence, victims, and surrounding environments to preserve the scene exactly as it was found for investigative and legal purposes.
Objectives of Crime Scene Photography
-
Documentation: Accurately record the condition of the scene at the time of discovery.
-
Evidence preservation: Capture fragile or perishable evidence before it is collected or altered.
-
Reconstruction: Help investigators, experts, and juries understand the sequence of events.
-
Legal support: Provide admissible visual proof in court.
Principles of Crime Scene Photography
-
Accuracy: The photo must represent the scene exactly as it was found. Avoid moving objects or staging.
-
Completeness: All areas and evidence should be photographed systematically.
-
Clarity: Photos must be sharp, well-lit, and correctly exposed.
-
Scale: Use measurement tools to indicate the size of evidence.
-
Consistency: Use the same procedures, angles, and equipment throughout the investigation.
-
Documentation: Each photo should be logged with time, date, photographer, location, and description.
Equipment Commonly Used
-
Digital single-lens reflex (DSLR) cameras or mirrorless cameras
-
Tripod for stability
-
Flash or external lighting
-
Scales/rulers for evidence
-
Specialized lenses for macro (close-up) photography
Process of Crime Scene Photography
-
Secure the Scene: Ensure no one disturbs evidence.
-
Plan the Shots: Decide order: overall → mid-range → close-up.
-
Photograph Without Moving Evidence: Capture the scene as is.
-
Use Proper Angles and Lighting: Avoid shadows or reflections that obscure details.
-
Document Each Image: Maintain a log or digital record.

Laboratory Photography
Laboratory photography is the process of capturing detailed images of evidence or specimens in a forensic laboratory under controlled conditions. These images are used for analysis, comparison, documentation, and presentation in court.
Objectives of Laboratory Photography
-
Detailed documentation of evidence: Capture fine details that may not be visible at the crime scene.
-
Evidence comparison: Photograph evidence for comparison (e.g., tool marks, fingerprints, footwear impressions).
-
Permanent record: Provide a visual record of evidence before it is altered, tested, or consumed.
-
Court presentation: Produce clear images suitable for legal proceedings.
Types of Laboratory Photography
-
Macrophotography (Close-Up Photography)
-
Captures small evidence in detail (e.g., bullets, fibers, fingerprints).
-
Often uses macro lenses and sometimes magnification.
-
-
Microscopic Photography
-
Uses microscopes with cameras to document microscopic details.
-
Common for hair, fibers, gunshot residue, or trace evidence.
-
-
Comparison Photography
-
Compares two or more pieces of evidence side by side.
-
Examples: tire treads, shoe prints, tool marks.
-
-
Specialized Photography
-
Uses UV, IR, or alternate light sources to reveal evidence not visible under normal light.
-
Examples: latent fingerprints, bodily fluids, or alterations in documents.
-
Equipment Commonly Used
-
DSLR or mirrorless cameras with macro lenses
-
Tripod for stability
-
Light sources: ring lights, fiber-optic lights, or LED panels
-
Microscopes with digital cameras
-
Color cards, scales, and rulers for reference
Applications in Forensics
-
Firearms and tool mark examination
-
Document analysis (altered or forged documents)
-
Trace evidence analysis (hair, fibers, glass)
-
Fingerprint and footwear pattern documentation
-
Toxicology samples under special lighting
Follow cyberdeepakyadav.com on
Facebook, Twitter, LinkedIn, Instagram, and YouTube
What's Your Reaction?